Workspace panel
The workspace panel is an interface and view of the modules network. It enables users to create and manipulate the network: modules and connections.
Creating new modules
The Workspace Panel is a place for creating modules and networking them by dragging lines between their ports.
There are 4 ways of creating modules in the Workspace Panel:
- by dragging modules from the Library Panel and dropping them into the Workspace,
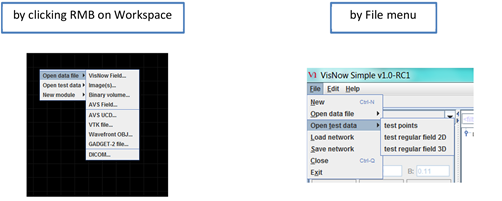
- by clicking the right mouse button on workspace, expanding New_Module, Open_data_file or Open_test_data and double-clicking the left mouse button on the needed module,
- by the Output Port Wizard – click the right mouse button on the output port of module, expand Attach menu and double-click the left mouse button on the needed module; (only for modules that can be connected to this port),
- by selecting File->Open_data_file->needed_module or File->Open_test_data->needed_module in the Application main menu (only for reading modules and test object modules).
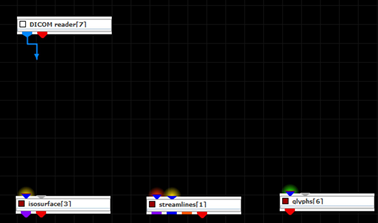
After starting VisNow there is only a Viewer3D module placed at the bottom of the workspace.

Module appearance
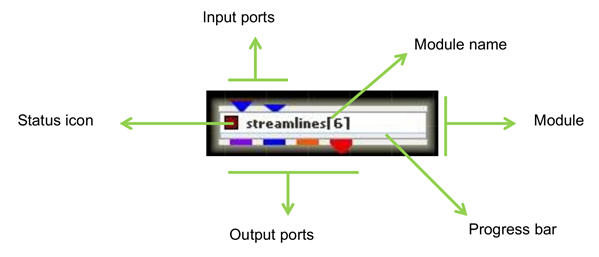
Modules visible in the workspace may consist of:
- Input ports – located at the top of the module
- Output ports – located at the bottom of the module
- Status icon – located on the left of the module
- Module name – located in the middle of the module
- Progress bar – located between module name and output ports
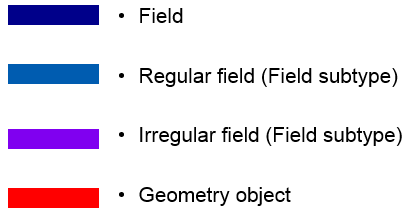
Colours of input and output ports refer to their data type.
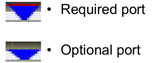
Shapes of input ports depend on the necessity of connecting them. If the input port is required to run the module, then it will protrude over the margin of the module. Red colour of the line above required input port means that there is no connection and yellow one – there is connection, but no data.
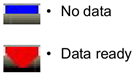
The shape of output ports depends on the presence of data in it.
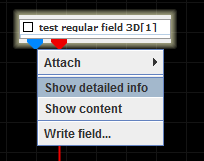
Clicking right mouse button on port opens the port menu which may contain:
- Attach menu - Output Port Wizard
- Show detailed info
- Show Content
- Write field
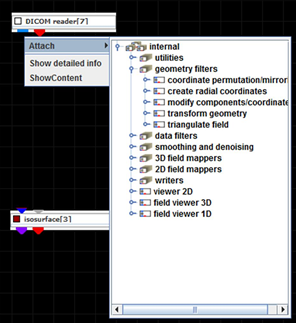
The Output Port Wizard can be expanded by selecting Attach from the port menu. It allows creating new modules, which will be automatically connected to the current port. The provided list is filtered and shows only modules that can process data from this output port. Double-clicking a module from the tree connects it.
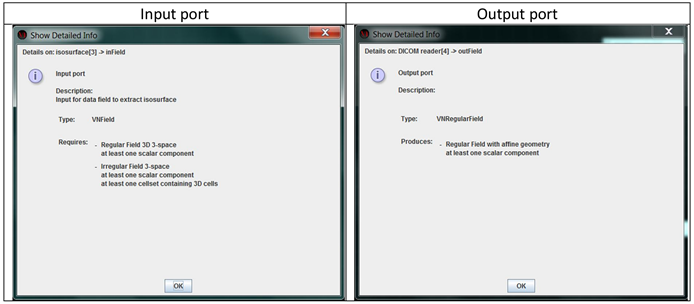
Selecting Show detailed info opens the Show Detailed Info Window. The appearance of this window depends on whether it is an input or an output port.
The first section provides information about what kind of port it is (input or output) and a short description of the port (“Description:”). The next paragraph (“Type:”) gives information on what type of data will be produced or what data is needed. The last section (“Requires:”) in the case of an input port contains special acceptors which are needed to run the module. At least one acceptor from the list must be requisite. Produced data coming from the output port must satisfy at least one acceptor of input port. The last section in the case of an output port (“Produces:”) gives information about what data is going to be produced.
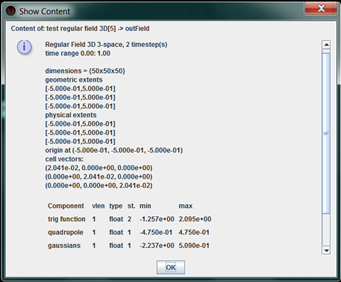
Show content shows Info window (for more information about the Show Content Window see: VisNow Data Types).
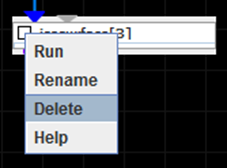
Every module has its Module menu. The Module menu can be opened by clicking the right mouse button on the module box. It includes:
- Run – runs a module
- Rename – renames a module
- Delete – deletes a module
- Help – opens the help window of the current module
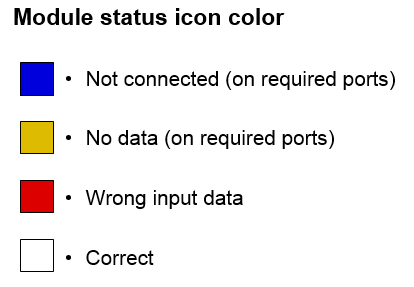
Dark-blue colour of the Status icon means that at least one of the necessary input ports is not connected. When all necessary input ports are connected, but still there is no data, the colour of the Status icon changes to yellow. Red colour means that the data on one of the required input ports is not acceptable. White colour means that the module is ready to run.
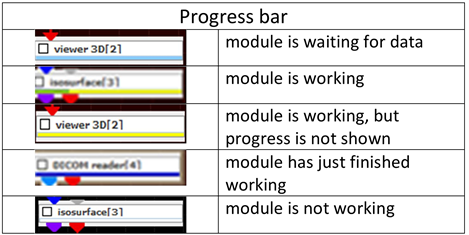
The Progress bar refers to the state of the module. Light blue colour of the Progress bar means that all necessary input ports of the module are connected, but it is waiting for data. Partially green and partially yellow bars show the stage of completion of action of the module (only implemented in some long-acting modules). An entire yellow bar points out that the module is working (but progress is not shown). Dark blue colour means that the module has just finished working and is preparing output ports. When the module is not working then the colour is white.
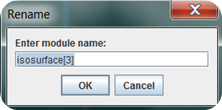
The module name can be changed in Module menu -> Rename.
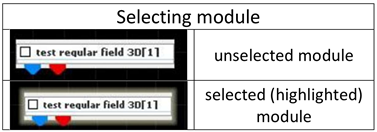
The module can be selected by clicking the left mouse button on the module or in the Module panel. Then the module is highlighted and the Module panel of the current module is presented. Hereby, it is possible to change its parameters. Dragging the module enables to move it onto workspace.
Creating networks
Modules on the Workspace can be connected if the output port of one module is connectable to the input port of another one. Two ports are connectable if input port and output port are of the same type and some additional requirements of the input port are fulfilled. These additional requirements of the input port called acceptors can be viewed in Show Detailed Info Window when clicking the right mouse button on the input port -> select Show detailed info -> section: “Requires:”. Also additional requirements of the output port are presented in the Show Detailed Info Window which appears by clicking the right mouse button on the input port -> select Show detailed info -> section: “Produces:”.
Modules can be connected in 3 ways:
- by Output Port Wizard - connection is made automatically,
- by automatic connection of output port of VNGeometryObject type with Viewer3D,
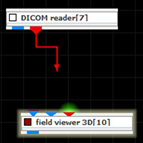
[Hint: Automatic connection of output ports with Viewer3D can be disabled by Edit->Preferences->Properties->unselect Auto connect to Viewer 3D] - by connecting input port and output port with mouse dragging: catch output port with left mouse button -> Drag connection -> Release inside input port
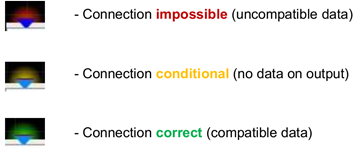
To connect two ports properly there is an input port facility. While dragging the mouse from the output port of one module, compatible input ports of other modules are highlighted. When a connection is impossible (data is incompatible), the input port is highlighted in red. When there is no data on the output port, a connection is conditional. Then the input port is highlighted in yellow. New data received from the output port must have appropriate components, which can be accepted by the input port. When data received from the output port is compatible with all components of the input port then the input port is highlighted in green.
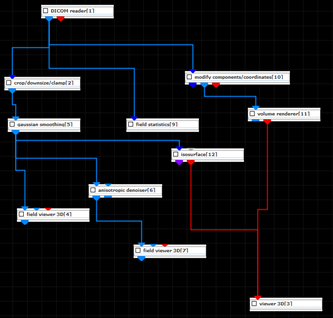
Connections between modules are forming a network, which can be more or less complicated.
To see what kind of data is sent through a connection, double click with the left mouse button on the connection, or leave the cursor over the output port and wait for the tooltip to appear, or click the right mouse button on the connection and then select Show Content from the menu (see: VisNow Data Types).
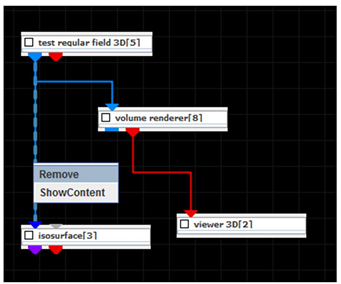
A connection can be deleted in two ways:
- by clicking the right mouse button on the connection line and selecting “Remove”
- by highlighting the connection and pressing the delete key
Running a module
There are 4 ways to run a module:
- after connecting data to all necessary input ports
- after changing one or more parameters of the module in the Module Panel
- after clicking the right mouse button on a module and selecting Run
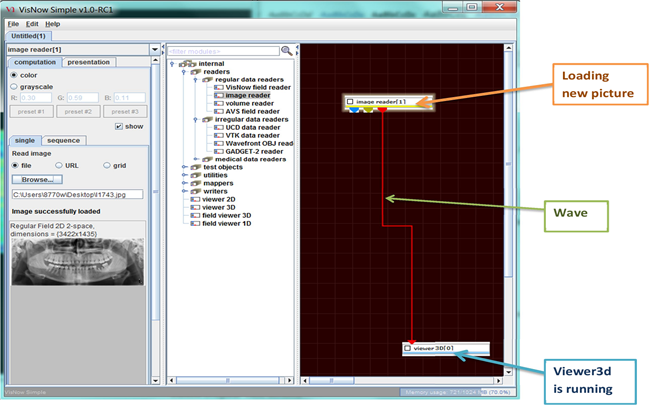
- by wave from induced network, when new data is delivered to input port, eg. loading new picture induces a wave which runs all connected modules
[Hint: Some modules have a WAIT button, when pressed it allows modifying many parameters before running this module. This button is used when a module works for quite a long time.]
[Hint: Some modules are off by default. Pressing the COMPUTE button is required to run them.]
[Hint: Some modules are not induced by wave from the network. Selecting AUTO in the Module Panel runs the module when new data with appropriate components is delivered to the input port.]
[Hint: When a module is running, the background is changing its colour from black into slightly red.]
Deleting modules
A module can be deleted by:
- clicking the right mouse button on the Status Icon of the module and selecting delete,
- selecting the module and pressing the delete key.